Go to Settings >> Configuration from the navigation bar and click Normalization Policies.
Click Add.
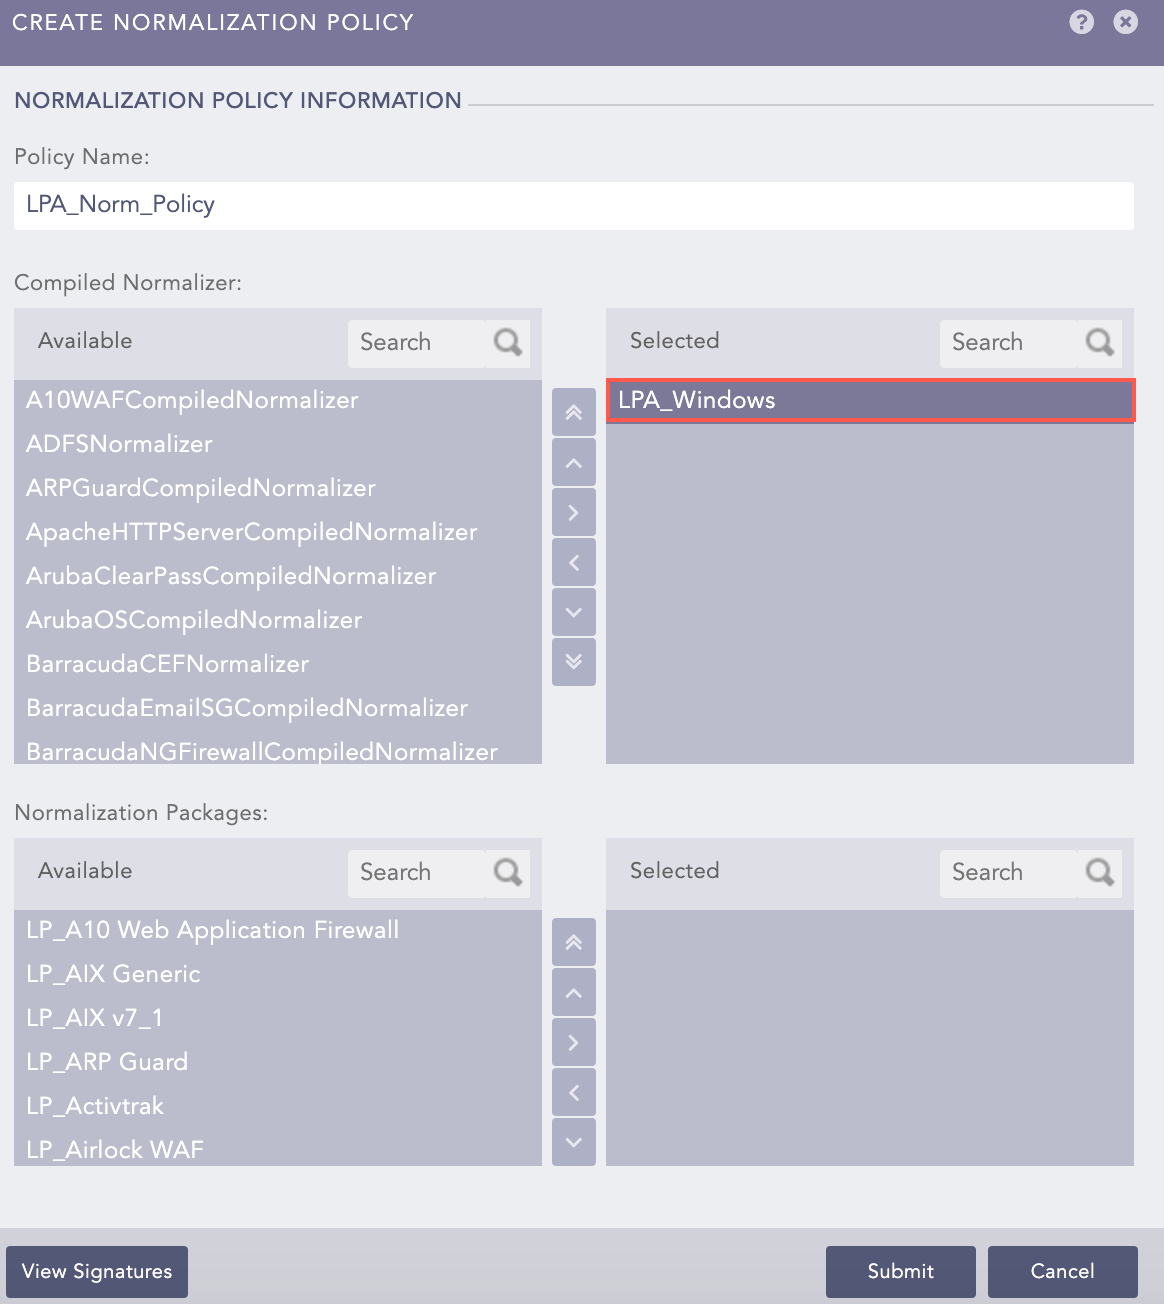
Enter a Policy Name.
Select LPA_Windows.
Click Submit.
Adding a Normalization Policy
Go to Settings >> Configuration from the navigation bar and click Devices.
Click Add.
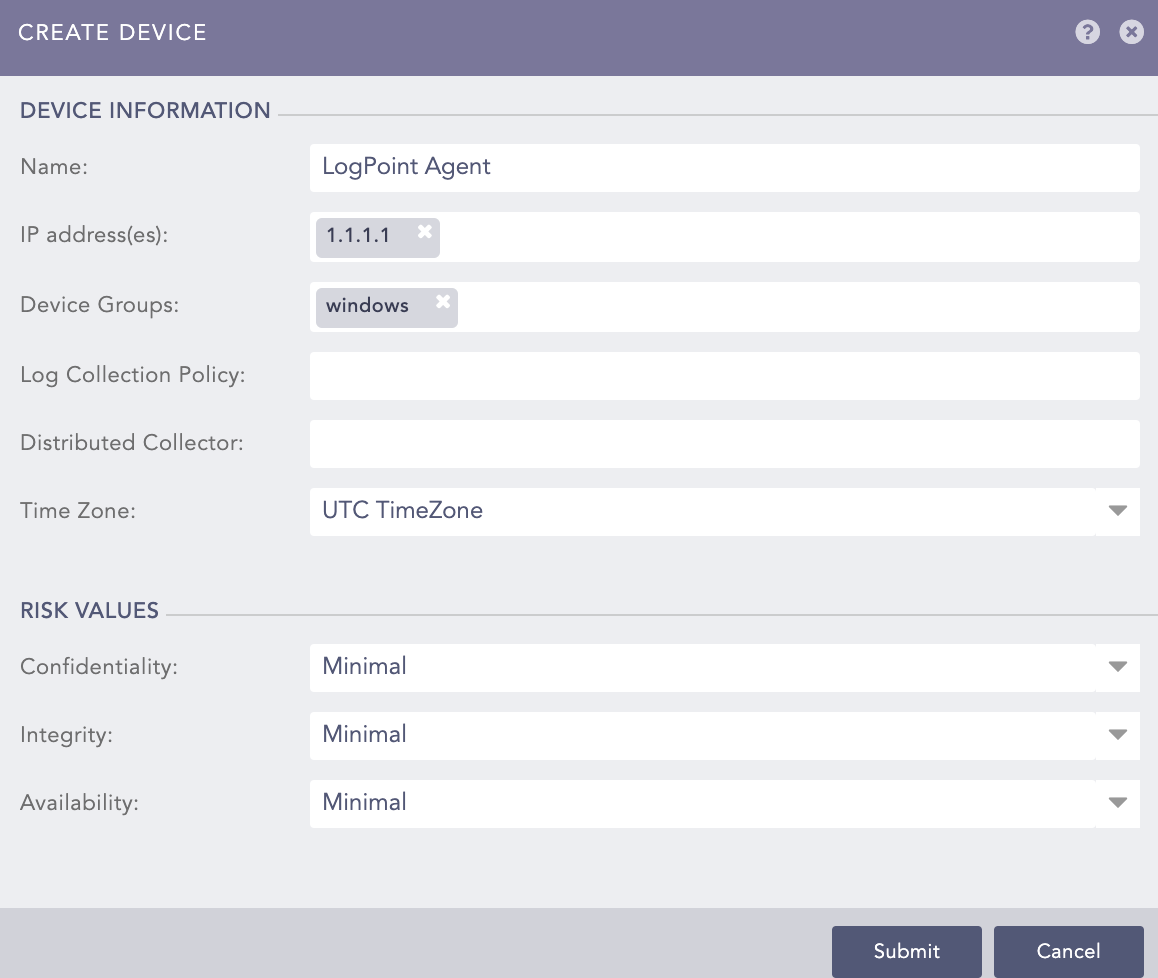
Enter Name and IP address(es) of the Windows device.
Select the Device Groups.
Select an appropriate Log Collection Policy for the logs.
Select a collector or a forwarder from the Distributed Collector drop-down menu.
Select a Time Zone from the drop-down menu.
Note
The time zone of the device must be the same as the Windows device. Otherwise, log timestamp (log_ts) and event received timestamp (event_received_ts) mismatches.
Configure the Risk Values for Confidentiality, Integrity, and Availability. These values are used to calculate the risk levels of the alerts generated from the device.
Click Submit.
Adding LogPoint Agent Device
Click the Add Collectors/Fetchers ( ) icon under Actions of the added LogPoint Agent device.
Click LogPoint Agent Powered by NxLog.
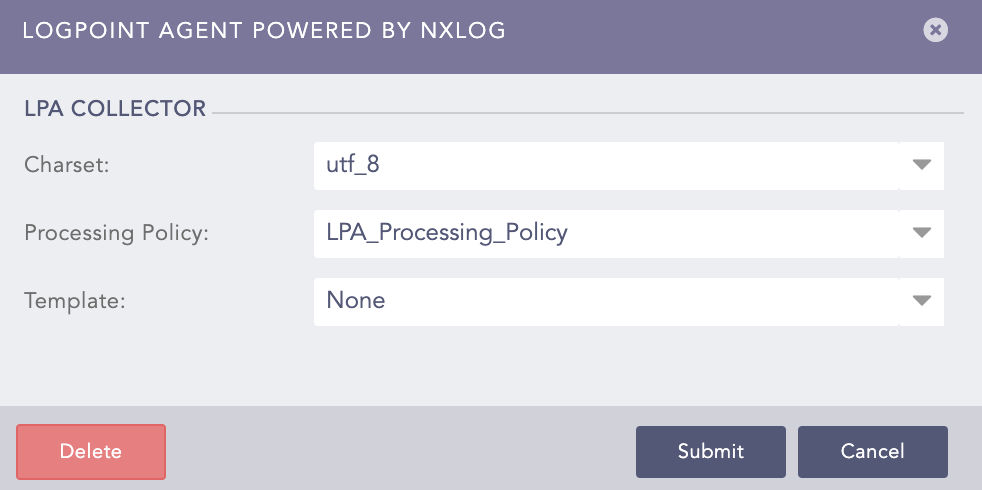
Select a Processing Policy that uses the previously created normalization policy.
Select the Charset.
Select a Template to add configuration to LogPoint Agent for Windows.
Click Submit.
LogPoint Agent Powered by NxLog
Click Yes.
Note
You can either configure LogPoint Agent Collector by clicking Yes in Confirmation or by clicking Manage of LogPoint Agent Powered by NxLog v5.2.3 under Settings >> System Settings >> Plugins.

Go to Settings >> System Settings from the navigation bar and click Plugins.
Find LogPoint Agent Powered by NxLog 5.2.4 and click Manage.
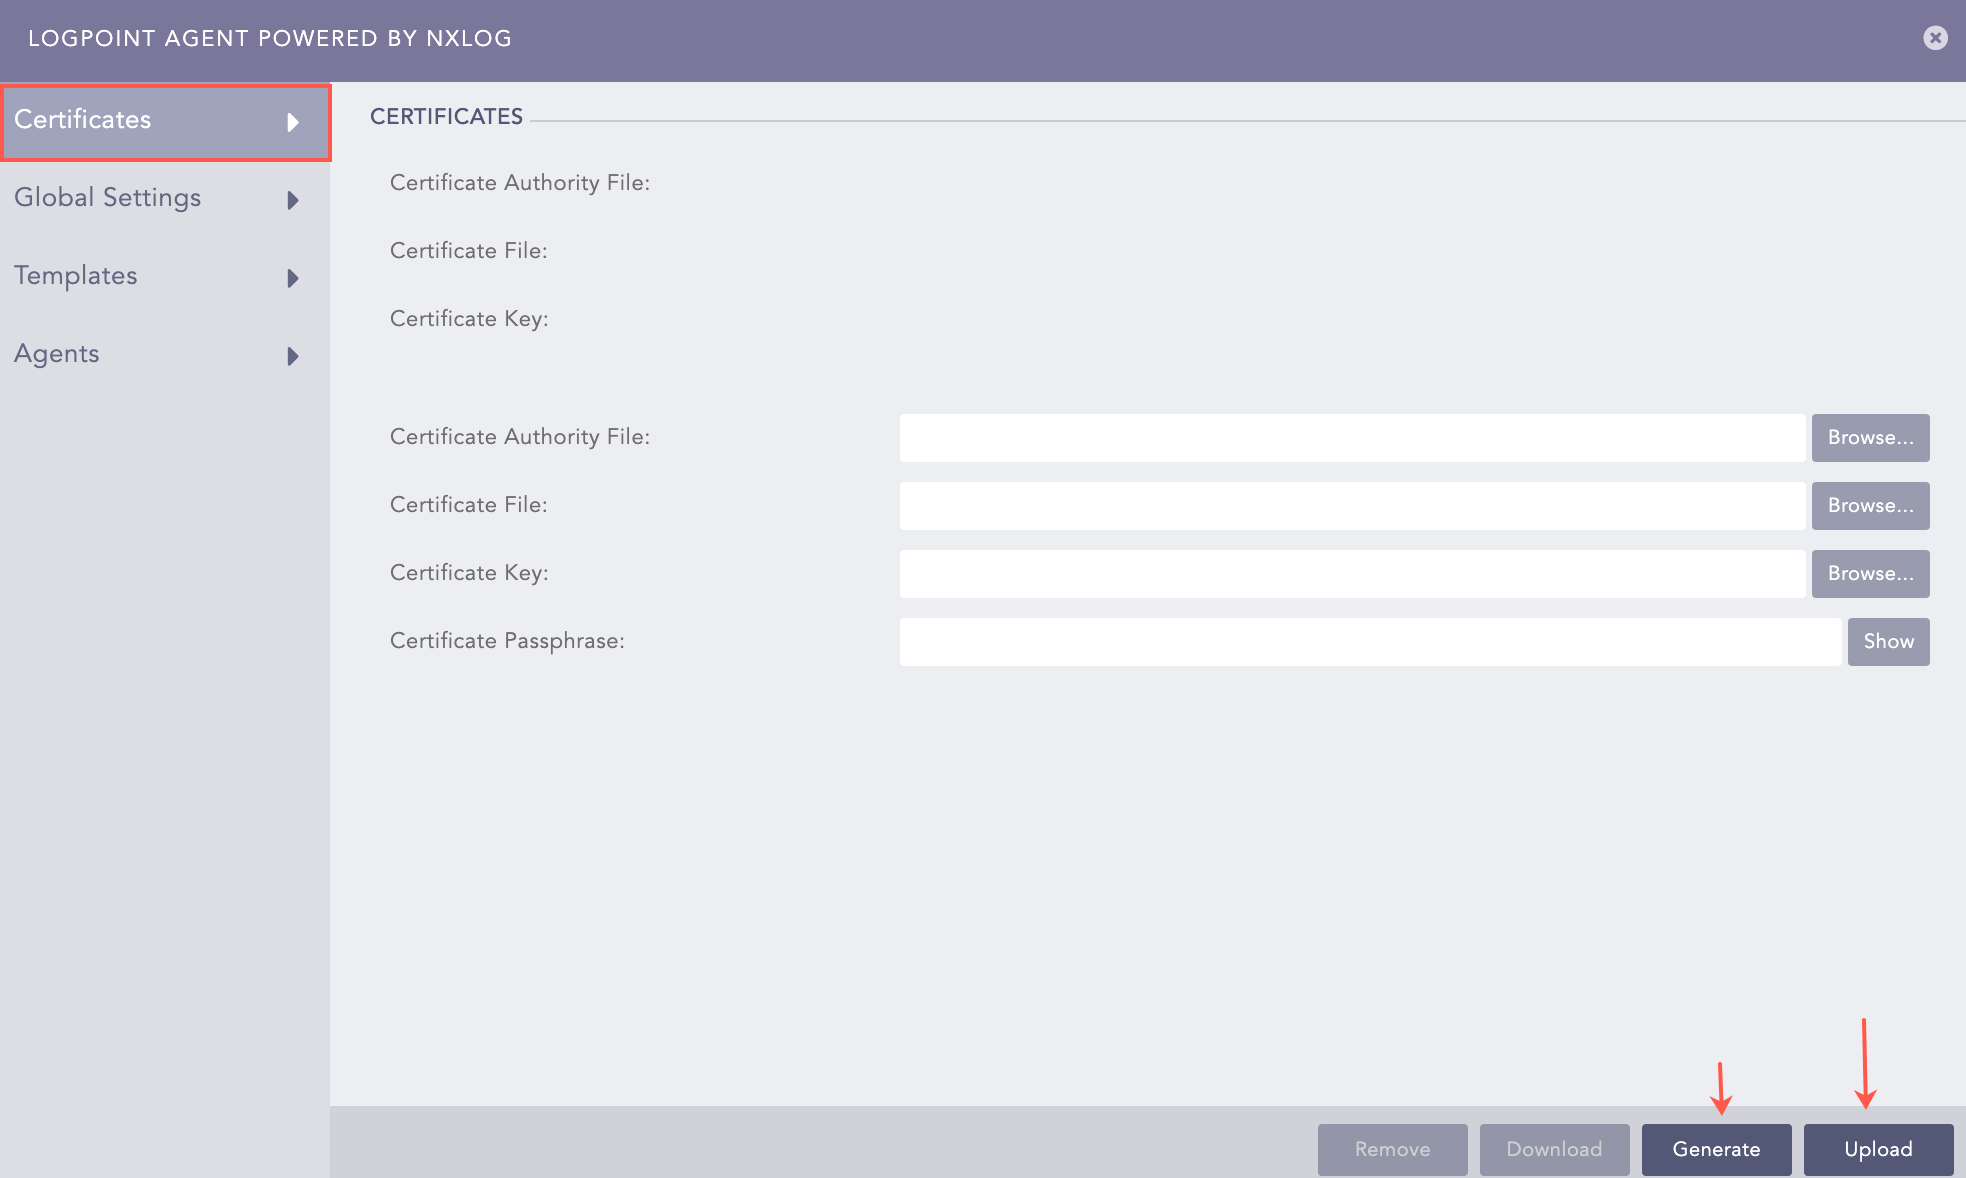
You can generate or upload certificates to create encrypted agent-to-server communication. LogPoint Agent Collector pushes these certificates to LogPoint Agent for Windows to establish the communication. LogPoint Agent for Windows then copies the certificates to a folder named cert under C:\Program Files (x86)\lpagent\ in the Windows device.
If you are removing the existing certificates and regenerating new certificates, change all the connections to TCP mode. To change the communication mode to TLS for the required devices, you must manually enable the Encryption mode from Template.
To generate or upload certificates:
Select Certificates.
Click Generate. Alternatively, click Browse to provide certificates from your local device and click Upload.
Enter a custom password in Certificate Passphrase to encrypt the generated certificates.
Generate or Upload Certificates
If there are any previous processes still running when generating certificates, you’ll see the CONFIRMATION warning. Since there is the possibility of communication breakdown with the agents, we recommend you wait for a few minutes to complete the running process before generating the certificates. Click No to wait or Yes to force certificate generation.
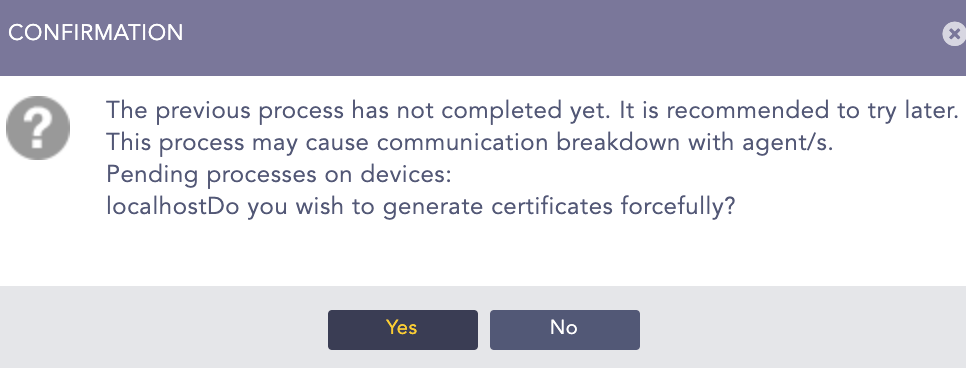
Confirmation Warning
You can also Download or Remove the generated or uploaded certificates.
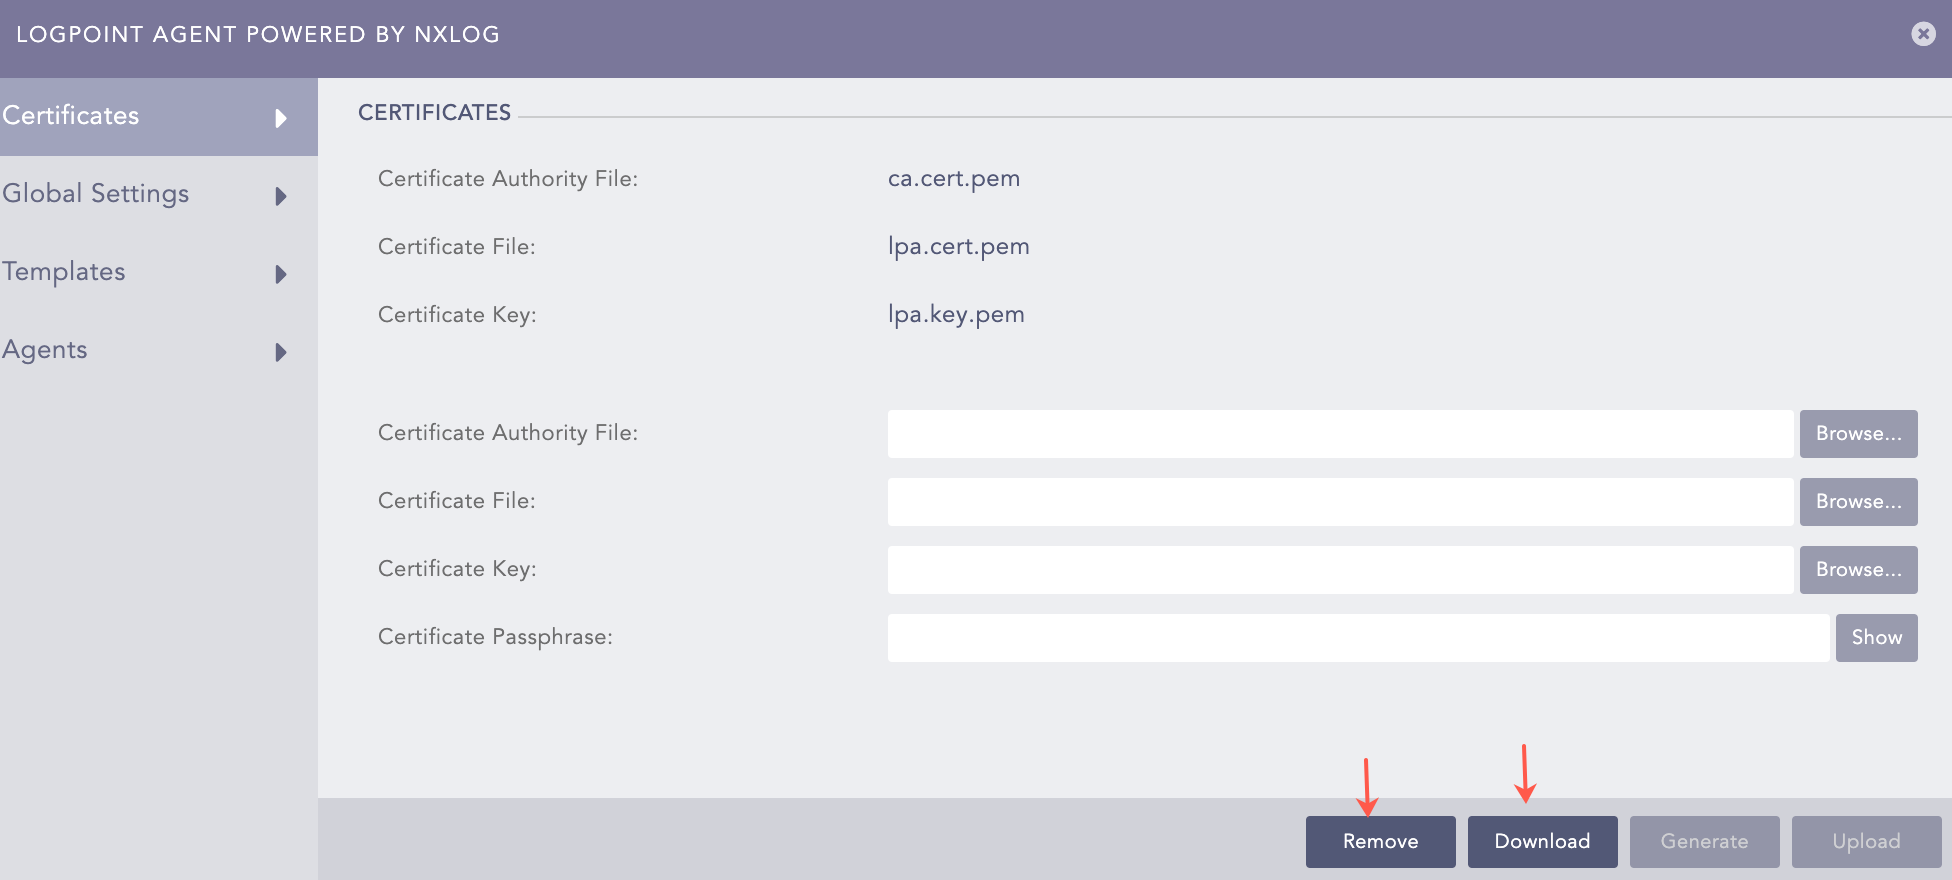
Remove or Download Certificates
Note
Once LogPoint Agent Collector generates the certificates, the cert folder under C:Program Files (x86) lpagent includes the required keys for the communication between Logpoint and LogPoint Agent for Windows. After you add a LogPoint Agent for Windows device and configure the LogPoint Agent Collector, the lpagent.conf file has the LogPoint Agent for Windows device’s IP in Listen, 7995 in Port and SSL in SocketType.
You can specify how frequently LogPoint Agent Collector should update its configuration files, whether to collect logs in batches and buffer settings of LogPoint Agent Collector logs in Global Settings. LogPoint Agent Collector uses a dedicated port to receive and decompress the batches of logs and supports both disk-based and memory-based log message buffering.
Select Global Settings.
Specify how frequently LogPoint Agent Collector should update its configuration files from Configuration update interval.
Select Enable Batching to enable the sending of logs in batches.
Select a Flush Limit, which is the maximum number of logs compressed in a batch.
Select a Flush interval in seconds, which is the maximum time LogPoint Agent for Windows waits to batch the logs before sending them to Logpoint. If the number of logs does not reach the flush limit within the specified flush interval, LogPoint Agent for Windows still batches the remaining logs and sends them to Logpoint.
Select Enable Buffering to overwrite old logs in the buffer during a network outage. It prevents log loss when the Logpoint server is unavailable.
Select the Max Size of the buffer in megabytes.
Select the Type of the buffer.
Select the Warn Limit to specify an optional limit smaller than Max Size, which triggers a warning message when reached. The logs are not emitted again until the buffer size drops to half of the warn limit and reaches it again to protect against a warning message flood.
Click Submit.
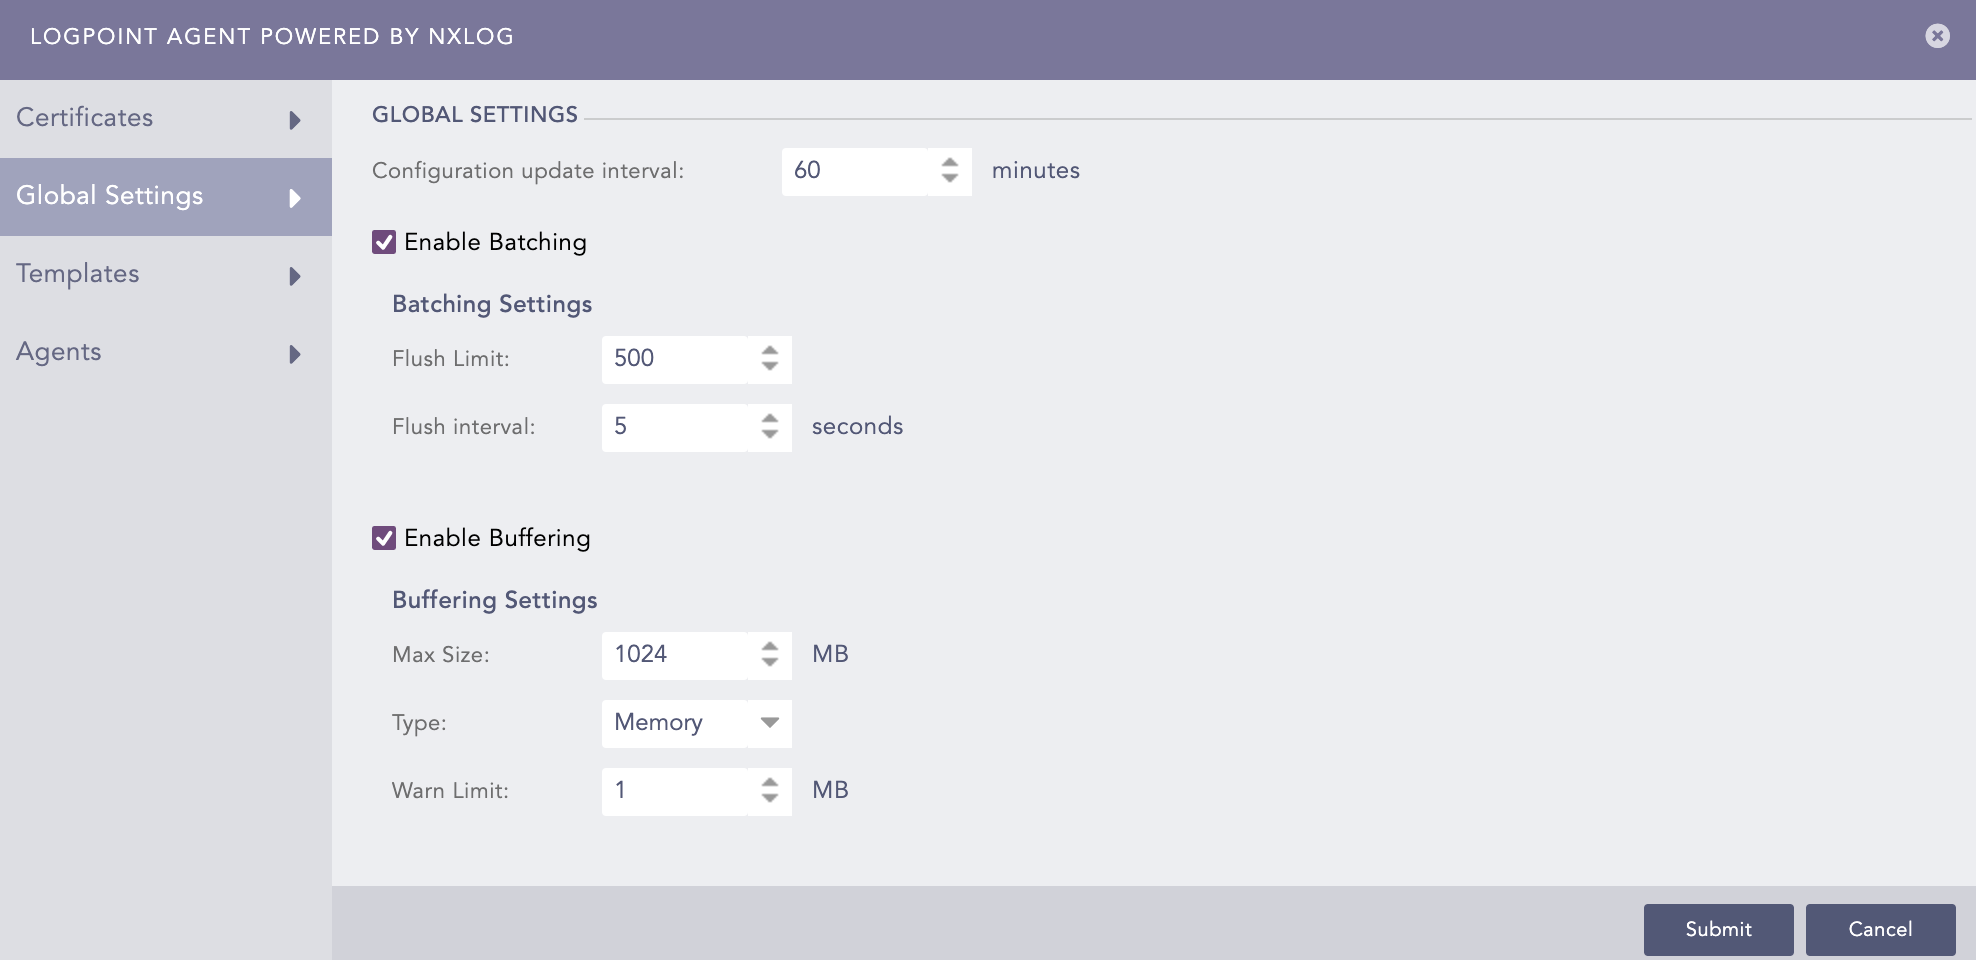
Global Settings
You can create configurations for LogPoint Agent Collector in Templates. These configurations can be saved as a template and added in Logpoint Agent Collector to collect logs from LogPoint Agent for Windows.
To create a template:
Select Templates.
Click Add.
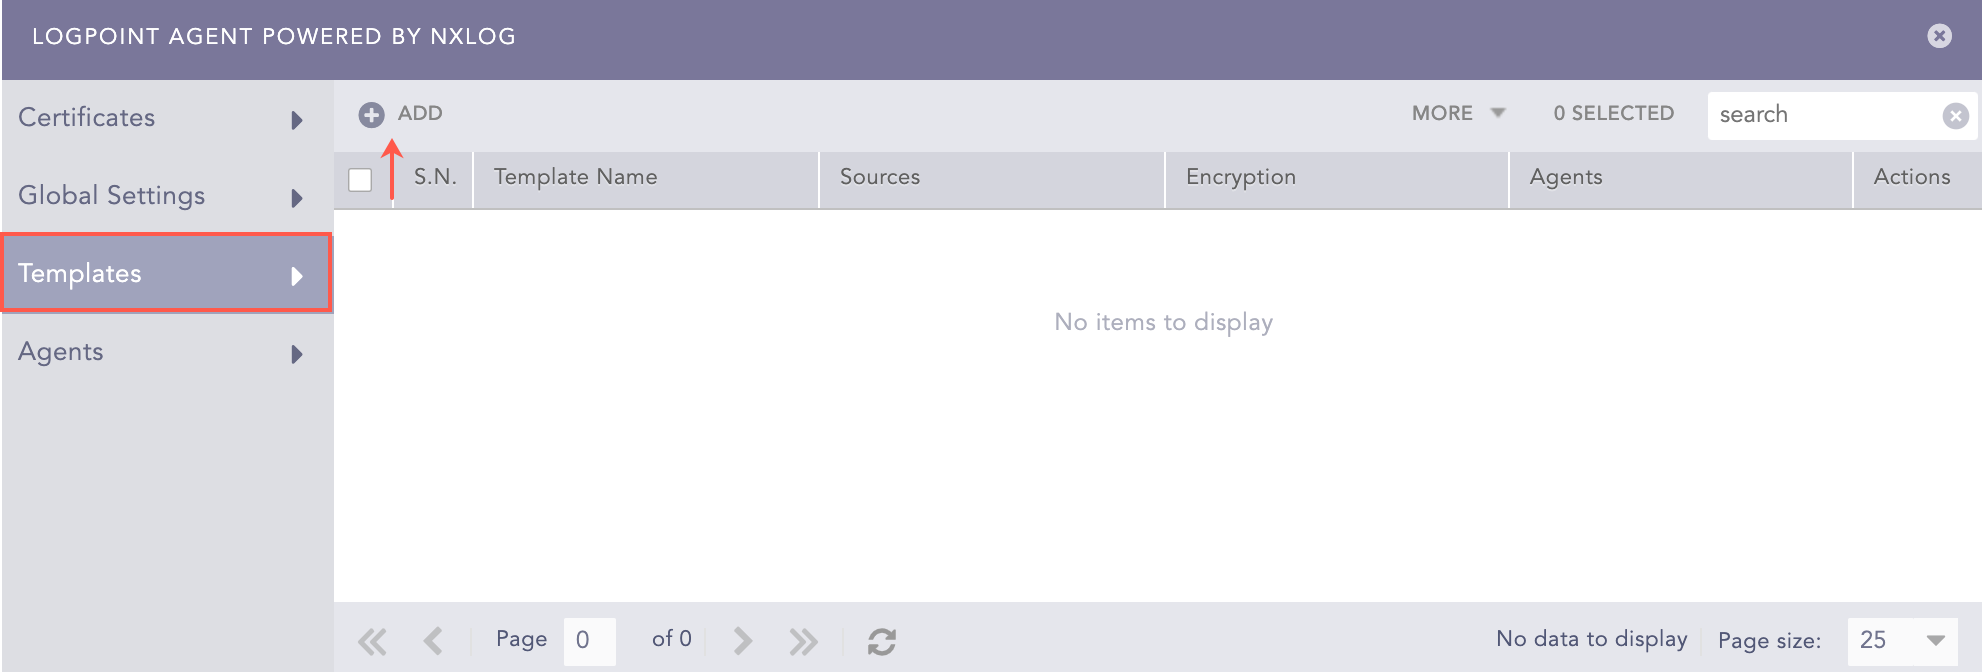
Templates
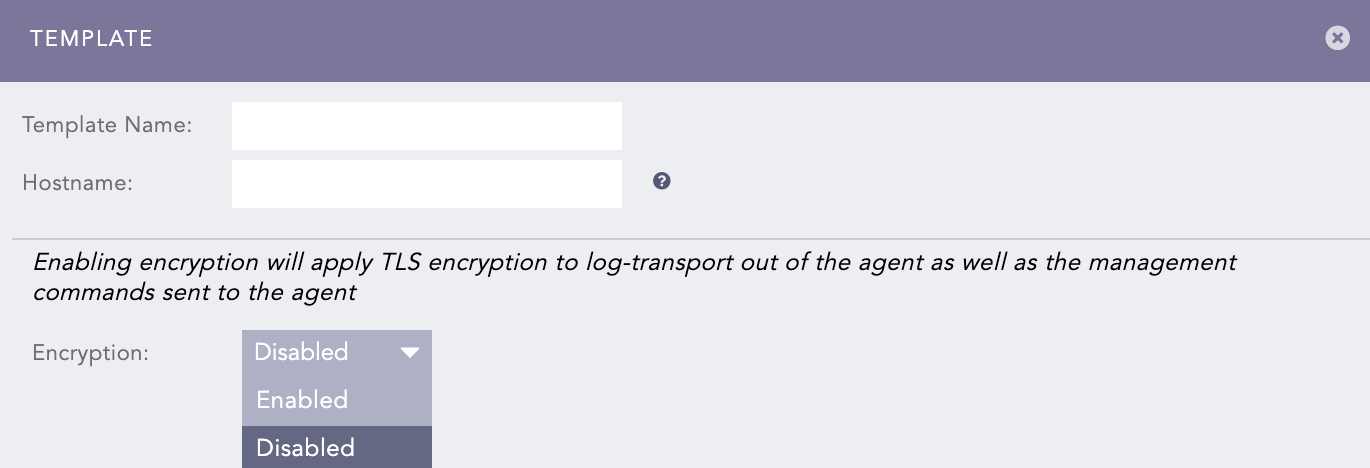
Enter a Template Name.
Enter the Hostname of Logpoint. This hostname is used by the agent to communicate with Logpoint. If you leave this empty, the agent communicates to Logpoint via IP address.
Select an encryption format from the Encryption drop-down menu if you have generated or uploaded certificates. If you enable encryption, the TLS encryption is applied to both the logs and the management commands sent to the agents.
Configuring a Template
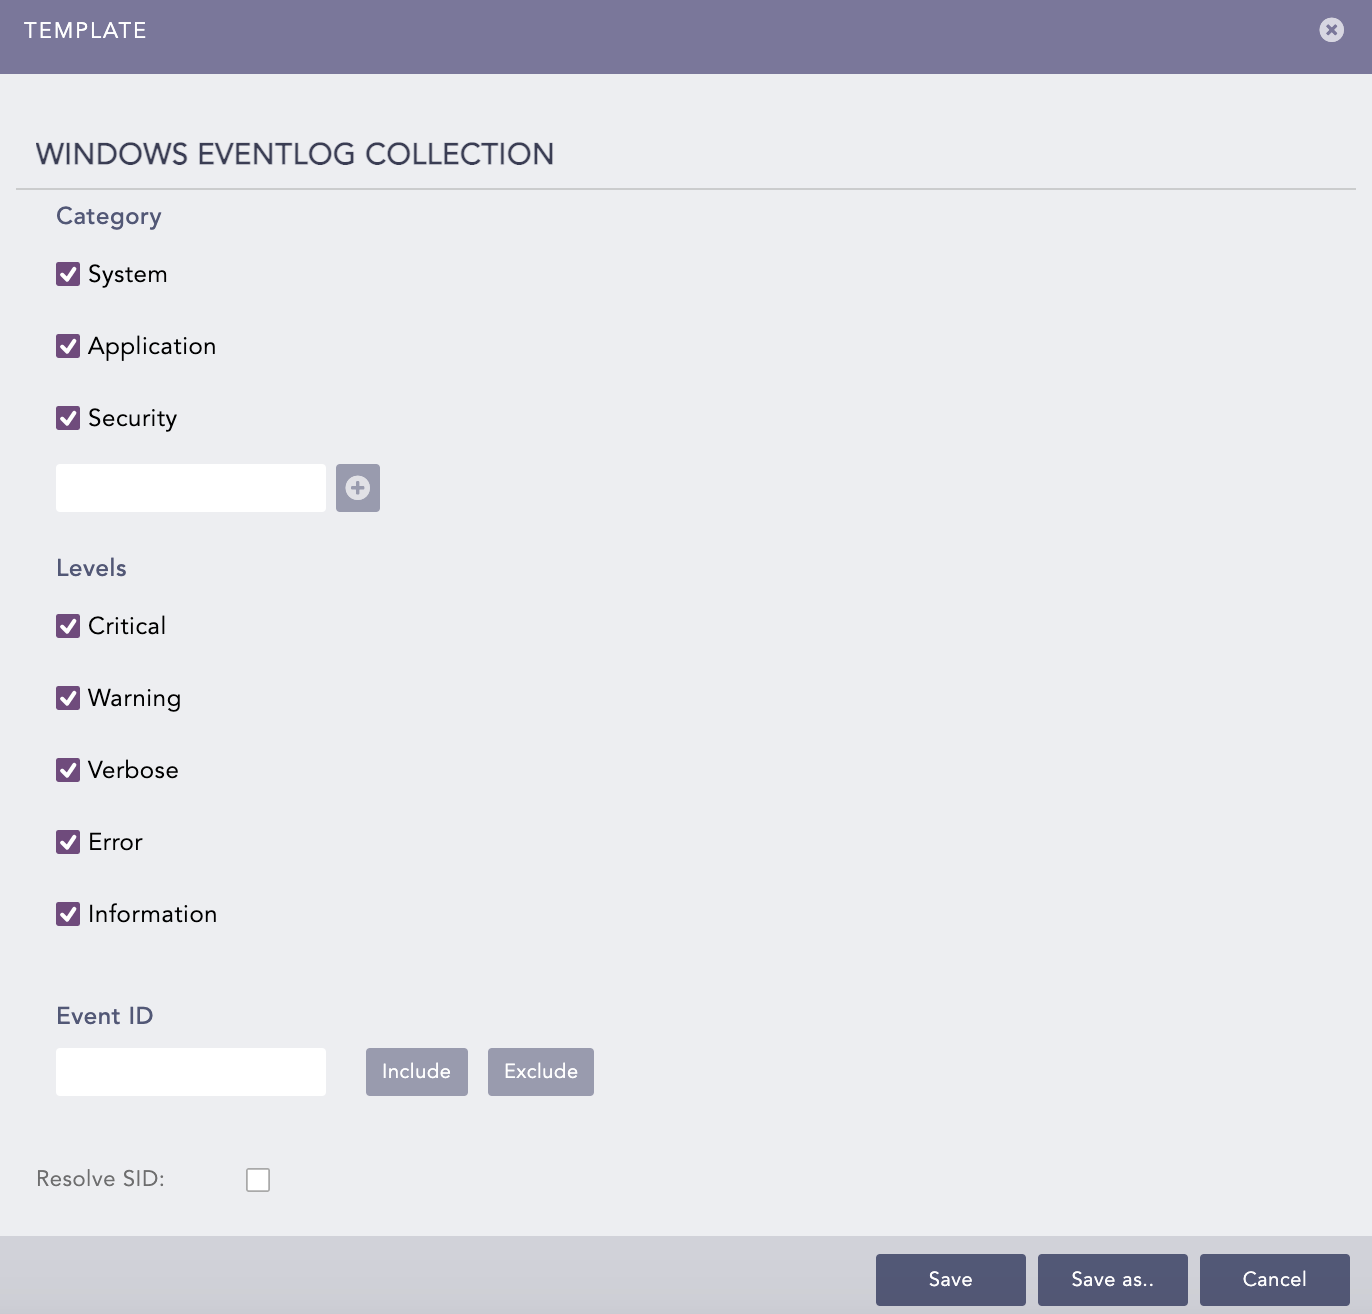
Windows Eventlog Collection allows you to collect the event logs from the Windows devices that support the recent EventLog API namely Windows 2008/Vista or later. It supports scanning of System, Application, Security, and Custom event logs.
To configure Windows Eventlog collection:
Select Category of Windows events that LogPoint Agent Collector should collect. You can also manually create a Category using Add.
Select the severity Levels of the event log. Levels are used to group logs and indicate their severity or verbosity.
Enter the Event ID of an event. This Windows identification number helps network administrators uniquely identify a specific log. You can choose to either Include or Exclude a particular event from the log results.
Select Resolve SID to normalize the Security ID or the name of the Security ID in the log message.
Note
Default buffer size for the Windows Eventlog Collection is 200,000 log messages.
Windows Eventlog Collection
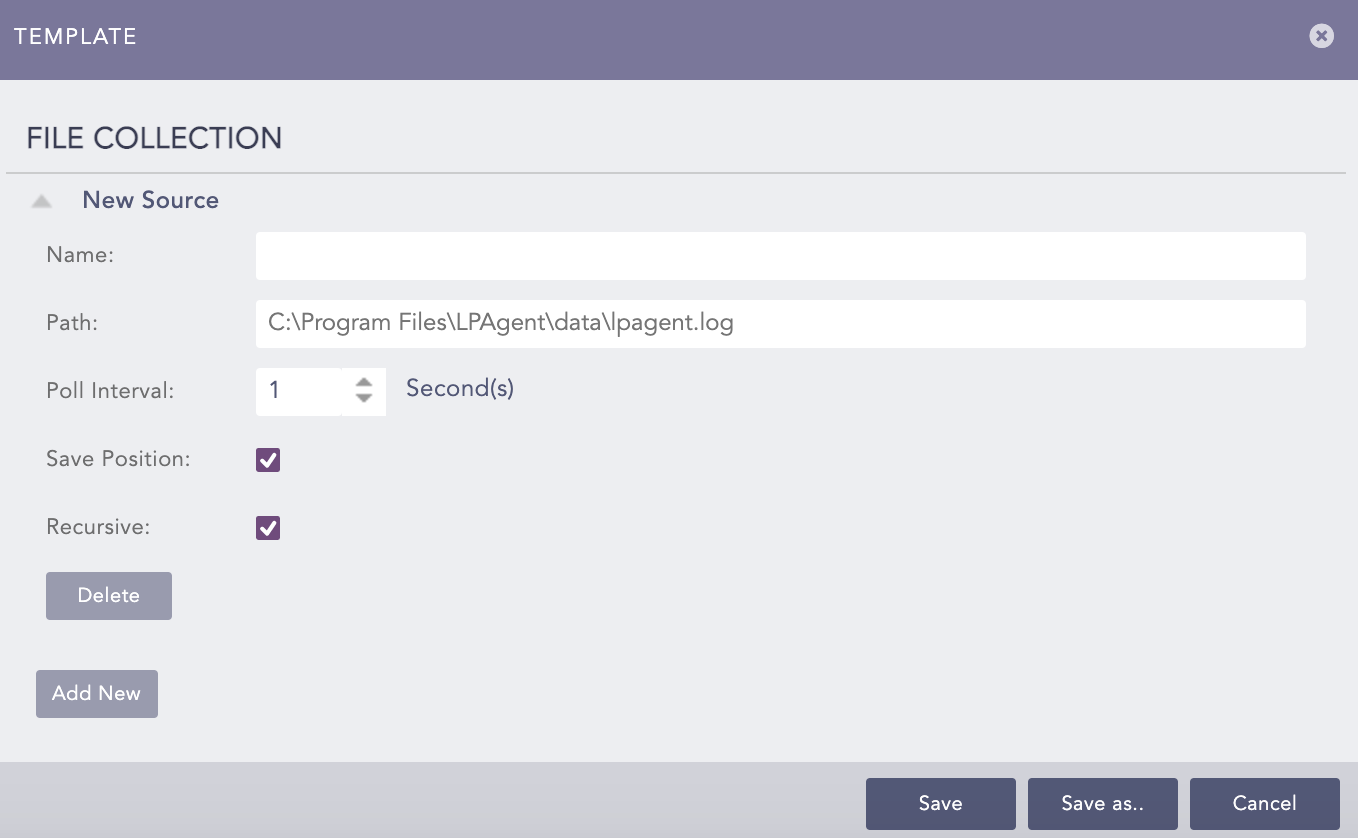
File Collection allows you to collect standard and custom flat files in ASCII format. You can use it with wildcards to enable the collection of all the files inside a directory or use it recursively within a directory tree.
To configure File Collection:
Enter the Name of the File Collection source.
Enter the Path of the target file or directory. If the path of the file contains a Unicode character, you must replace the character with wildcard “*”.
Select the Poll Interval in seconds. This interval defines how frequently LogPoint Agent for Windows checks for changes or new events in the specified directory.
Select Save Position to save the file position when LogPoint Agent for Windows stops.
Select Recursive to include files and directories nested inside the specified paths in the search.
You can add a new source for File Collection or remove an existing one using Add New and Delete.
File Collection
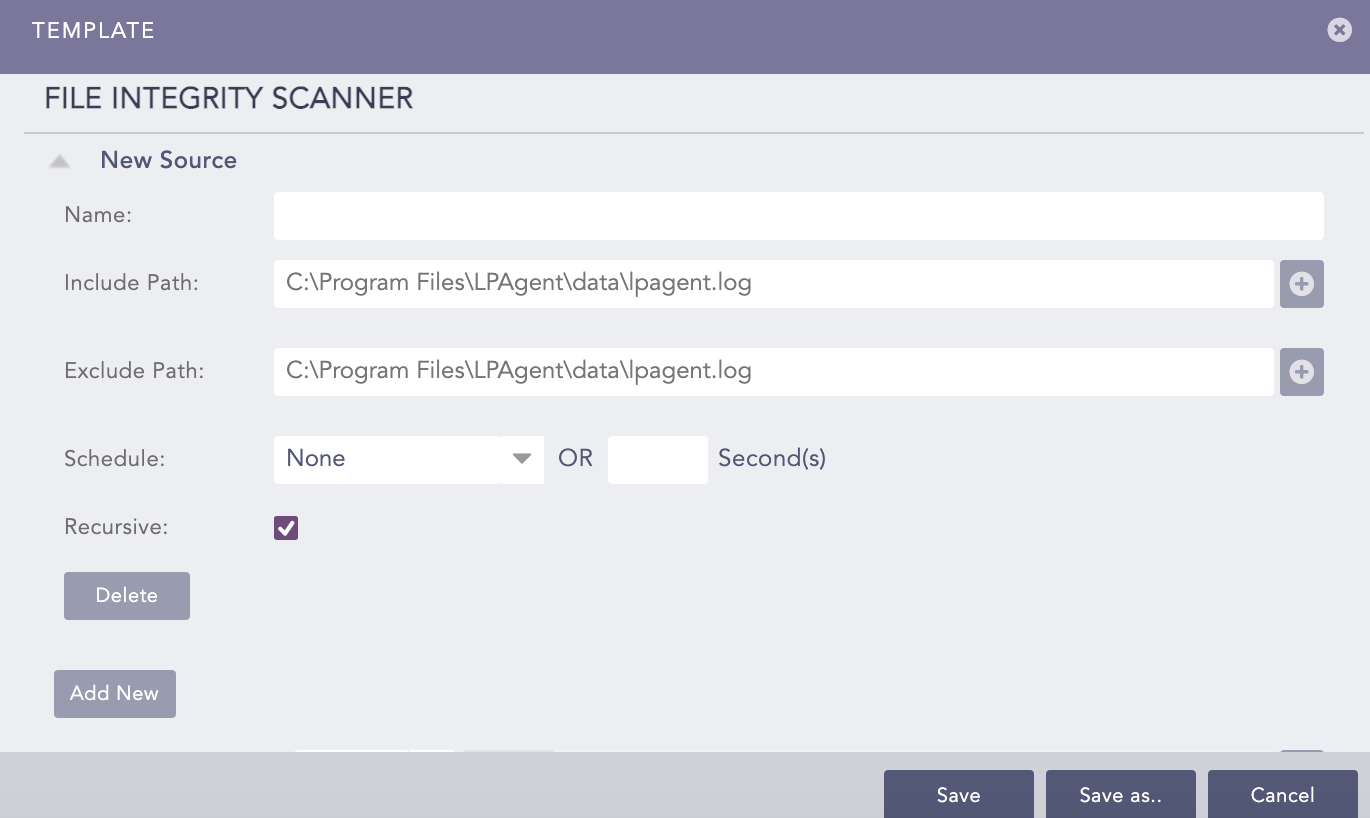
File Integrity Scanner scans Windows files and directories and generates event records if it detects any change or deletion. It monitors the following actions:
New Directory
Delete Directory
Rename Directory
New File
Change in File Content
Rename File
Delete File
LogPoint Agent Collector monitors these actions based on changes in the checksum values of the files and directories and then compares the checksum values during successive scans.
To configure File Integrity Scanner:
Enter the Name of the target file or directory to scan.
Enter path of the target file or directory in Include Path. If the path of the file contains a Unicode character, you must replace the character with wildcard “*”.
To stop scanning a particular file or directory, enter its path in Exclude Path.
Select the Schedule. A schedule is how frequently LogPoint Agent for Windows checks for changes in specified files and directories.
Select Recursive to include files and directories nested inside the specified paths in the search.
You can add a new source for File Integrity Scanner or remove an existing one using Add New and Delete.
File Integrity Scanner
Windows Registry Scanner scans the Windows registry and generates event records if there is any change or deletion on the registries.
To configure Windows Registry Scanner:
Enter the Name of the source of the target Windows registry.
Select the root key in Include Reg Value and enter the path of the target Windows registry to scan. Reg values are values that are used to store data in various formats by Windows. You can Add to include as many registry paths as required.
Select the root key to exclude in Exclude Reg Value and enter the path of the target Windows registry to skip scanning. You can Add to exclude as many registry paths as required.
Select the Schedule. The selected schedule defines how frequently the LogPoint Agent for Windows checks for the changes in the specified Windows registry.
Enable the 32-Bit System to scan registries of 32-bit Windows devices.
You can add a new source for or remove an existing one using Add New and Delete.
After completing the template configuration click Save, or click Save As to save the configuration with a different template name.
Click Cancel to abort the template configuration process.
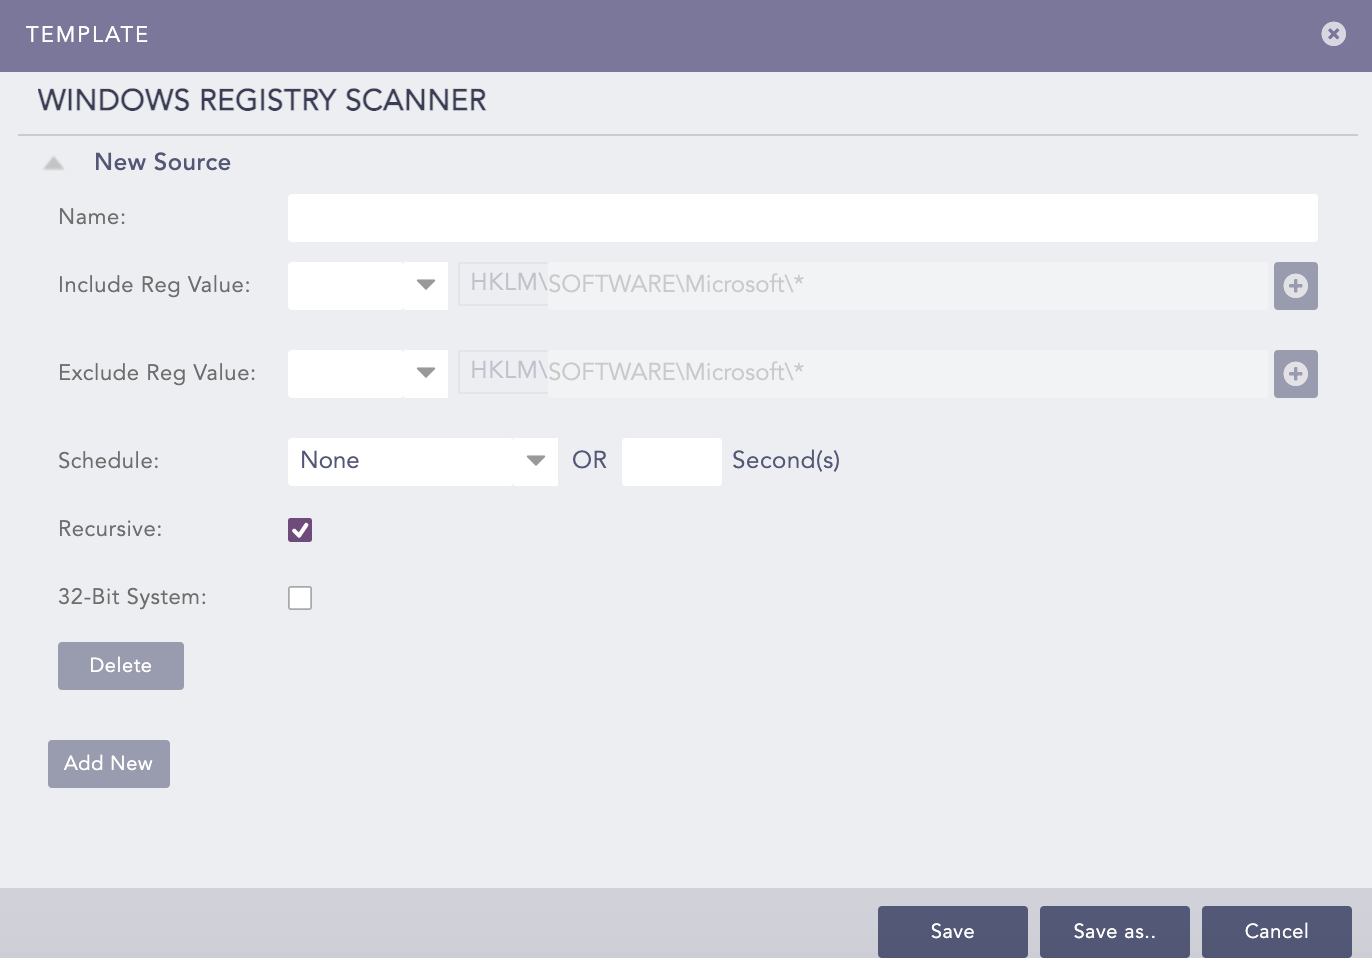
Windows Registry Scanner
You can see the details of all the Windows devices configured with LogPoint Agent Collector in Agents. The devices that were configured but disconnected now can also be displayed here by selecting Show Crashed Agents. You can also edit the templates added to those devices.
To edit the templates:
Select Agents.
Click the Device name and apply the necessary changes.
Click Save.
The Push icon under Actions can be used to push configurations from Logpoint Agent Collector to Windows device. You can export the current configuration of the Windows device from Logpoint to your local device using the Export icon. You can also view all the associated information of the device using the Details icon.
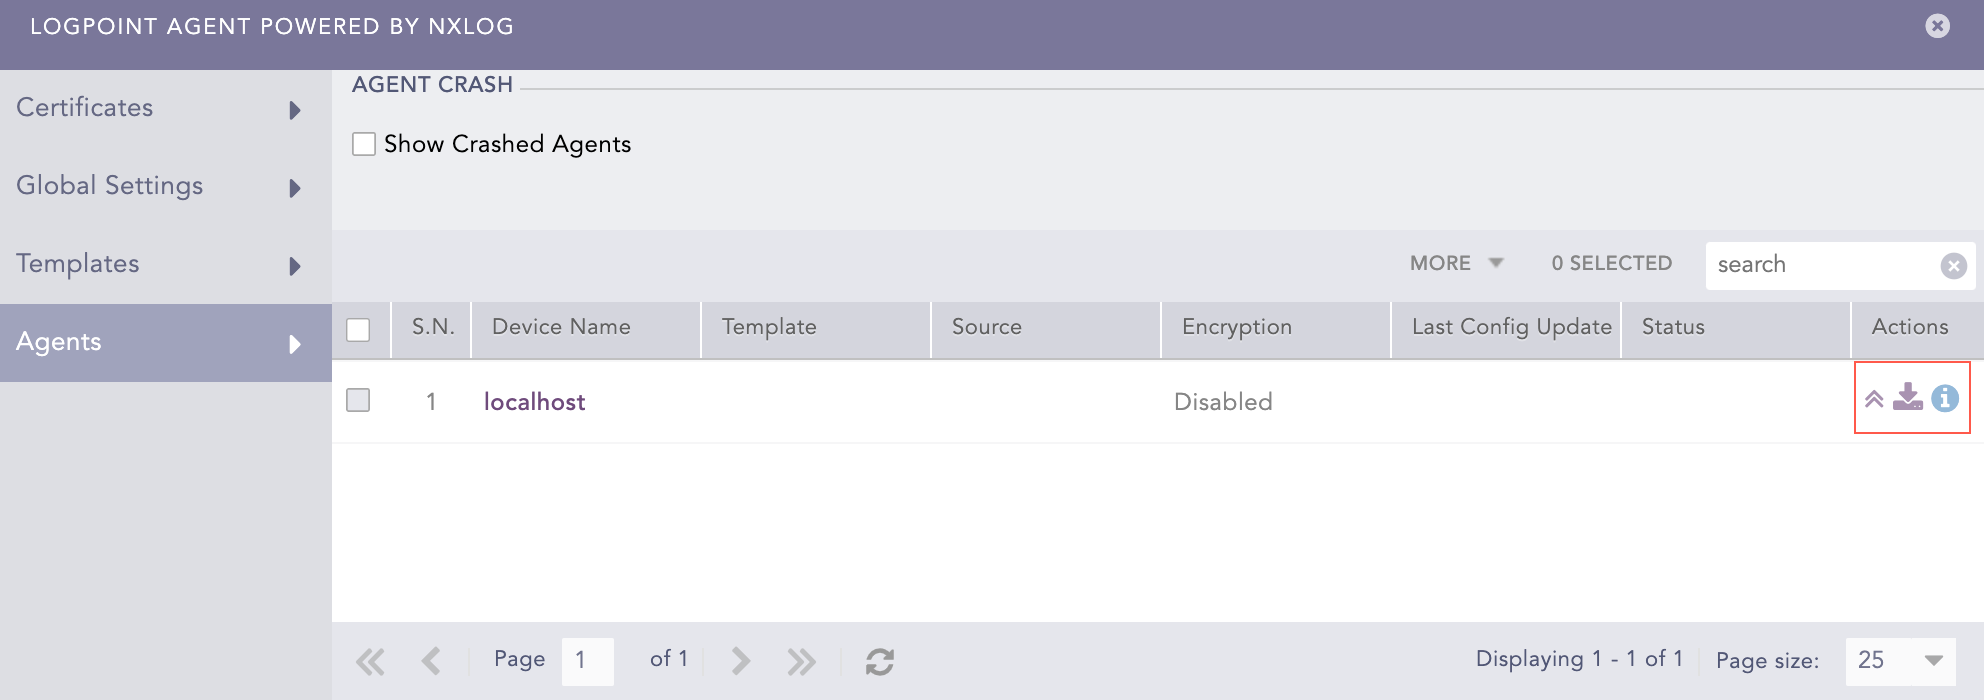
Agents